RSS Feed

Posts Tagged ‘bread’

  1. Homemade Love

    August 20, 2012 by admin

    Simmering tomatoes for marinara

    There are so many things that you eat every week that you can easily make at home.  It will increase the overall health of your family as you have complete control over ingredients while eliminating the preservatives and fillers found in may pre-made foods.

    We consciously chucked our microwave over 7 years ago in an effort to make more food from scratch and to save money.  Sure, microwaves are easy!  Right?  You just pop something in there and ‘presto!’  A few minutes later, it’s done.   But microwaved food is expensive and filled with preservatives and chemical enhancers that you don’t need.  Any microwaveable frozen meal is also significantly more expensive than purchasing the ingredients and creating the dish on your own.  And no need to fall for the ‘reheating’ excuse as a reason to keep the ol’ nuker.  Reheating food on the stovetop or in the oven is very quick and easy.

    Tip:  Most microwavable meals tend to be individual serving size.  If you cook from scratch, you’ll most likely end up with  leftovers.  Your homemade meal will provide you with a few lunches or snacks down the line, all for less money upfront.

    We have certain recurring items in our menu planning that are always homemade:

    • Bread : Easy and delicious, and nothing will make your home smell better than rising and baking bread!
    • Marinara sauce : So simple, you’ll embarrassed to admit you ever bought pre-made!
    • Hummus:  Making it yourself allows you to mix in your favorite flavors: roasted red pepper, or horse radish, or Kalamatas?  The list goes on…
    • Tzatziki: This fabulous sauce takes just minutes to prepare fresh and it can’t be beat!
    • Pizza: Make the dough, use your own marinara, and add your favorite toppings and cheese!

    Homemade pizza with vegetarian pepperoni!


    We use fresh whole tomatoes for our marinara.  We boil the garbanzo beans for our hummus.  These choices originated as part of our effort to avoid BPA in cans.  But we quickly saw how much tastier the end result was when the items are fresh made.  (Yes!  You can find BPA free canned tomatoes, etc., but you will pay a significant up-charge for that assurance.  And since we are on a budget, we had to seek out different solutions.)

    As much as we have always enjoyed cooking, we went full steam ahead with homemade food when Bluey was born.  We didn’t want his first tastes of food to be something processed.  Nor did we want to pay someone else to provide a product we could easily create on our own.  For instance, it isn’t hard to skin an apple, dice the fruit, boil the bits, and press it all through a strainer, or toss it in the food processor.  You can then freeze your homemade applesauce in a BPA free ice cube tray with a lid (or this one is great, too) and store it for up to 2 months.  The ice-cube trays make great baby-sized portions that thaw or heat up in a flash.  And it was so comforting to know the exact ingredients of every morsel our son was eating.

    We find that cooking from scratch is more of a mindset adjustment than anything else.  It isn’t horribly time consuming if you plan it out.  It doesn’t take a degree in the culinary arts to create wholesome, fresh meals.  It is about believing that you can do it, and then deciding that you’re going to do it.  Give it a try and allow yourself to succeed!


  2. Roll With It

    July 23, 2012 by admin

    Nothing will raise the spirits of your family and friends like the smell of fresh bread!  Bread cooking, bread rising—it’s a good thing.

    It’s way easier than you think.  People have been making bread for thousands of years and you can too!

    But even though it is easy to make- it is also easy to mess up.  We haven’t gone to culinary school.  We haven’t taken classes in baking.  We’ve learned to make bread through trial and error.  And we mean Error!  We can’t count the number of failed loaves, messed up breadsticks, and useless piecrusts we have created through the years.

    But Grandma didn’t spring from her crib able to make those awesome cookies either!  She made many mistakes— possibly that’s why her dog was so fat.

    Tip1:  Patience and practice.

    It can be frustrating to spend energy and time in the kitchen only to have your end result inedible.  At times like this, we fall back on our mantra: It’s not the end of the world.  Switch gears, change up the menu, and no one will know that your bread didn’t make it.  Try to figure out what went wrong later.  Right now, try to refocus and relax.

    Tip2: Save those failed bits of bread for duck feeding, scatter them for your backyard friends, or compost it!

    Don’t give up.  Eventually, we found our rhythm.  You will too.  Once you get your rhythm down, and have a few ‘go to’ recipes that usually work for you, you’ll find yourself cranking out bread and impressing your family and friends.

    Our most common error: leaving out an ingredient.  We get distracted by Life and zip along believing that we’re following our recipe, only to find out that our bread has failed.

    Life goes on!  We try to roll with it and improvise.


  3. Daddy Bread

    June 4, 2012 by admin

    Here’s our simple and popular bread, referred to around here as “Daddy Bread.”   It can be set up in the morning for evening bread, or cranked out in as little as two hours before dinner.  The longer rising time is better though.  Try to let it rise for as much time as you can spare.

    It’s a basic recipe.  Play around with it.  Add more salt or more yeast.  Adjust your rising times and notice how it turns out differently each time.  Use this as a starting place to make it your own loaf.

    Ingredients:

    5 cups flour:  we use Unbleached All-Purpose Flour.  Why pay extra money for bleached flour?

    2 cups water: If you filter your water to drink, then use filtered water in your recipes.  How the water tastes determines how the bread tastes.

    2 Tablespoons dry yeast: You can buy a one pound package of Red Star yeast for less than $5 at your supermarket.  It will keep for a long time in a jar in your fridge, and is a WAY better value than all those little envelopes.

    1 Teaspoon salt: Kosher or not?  It’s your choice.

    1 Tablespoon Olive Oil

    Method:

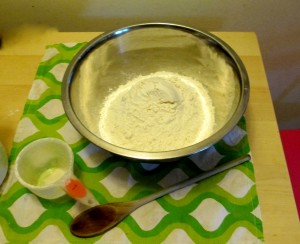
    1. Mix the flour and water together.  We do this by hand, why worry about a mixer?  You can use a mixer if you want.  Mix these together at least 25 strokes.
    2. Add yeast.  Mix another ten strokes.
    3. Add Salt.  Mix another ten Strokes.
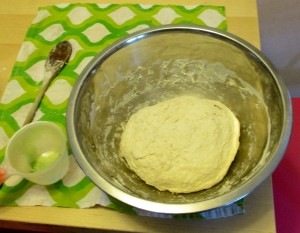
    4. Form into a big ball. Drizzle with olive oil and flip the ball over in the bowl a few times to make sure the whole thing is oil covered.
    5. Cover with a clean towel and put in a warm part of your kitchen.   Most places are fine, but keep it away from open windows and such.  We frequently set it backed into a corner of the counter.
    6. Let this part sit for 1 to 8 hours.  Longer the better, but we’ve made great bread with a one hour rise.
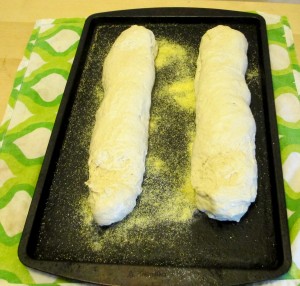
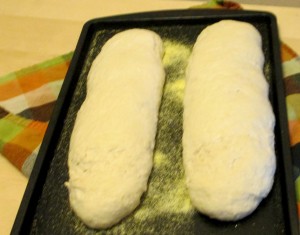
    7. Sprinkle corn meal on a sheet pan.  Break the dough into two roughly even clumps, and shape into long loaves, (no longer than your pan!)  A good trick is to fold the dough over on itself a couple of times.  When you like your loaf, lay it in the pan, cover with the towel, and let sit for 30 to 45 minutes. Don’t let it go much longer than that though, or the loaves will collapse!
    8. When you feel it’s ready, put into a 425 degree oven.  Bake for 20-25 minutes depending on your oven.
    9. Let it cool a bit before slicing.  Super hot bread tends to get crushed by the knife, a problem that goes away if you let it sit for ten minutes. (It will still be piping hot from the oven!)


    Now it’s ready to eat!  Enjoy!  We love Daddy Bread with butter or hummus.  Or  slice it up and make bruschetta.  However you like to eat Daddy Bread, if your family is like ours, your bread will disappear fast!