RSS Feed

Posts Tagged ‘Brenda Winter Hansen’

  1. Parks, parks, parks!

    July 15, 2013 by admin

    IMG_1487

    This post is by regular contributor, Brenda Winter Hansen, of write again.

    A lot of people have a love-hate relationship with their neighborhood park. Parks are likely one of the most problematic issues for every city (especially the big ones) because there’s often not enough money in the city budget to take care of them.  Everybody loves to use them, but not everybody respects them. Sound familiar?

    Many homeowners fear that a nearby a park will attract unsavory behavior: drugs, sex, vandalism, litter!!! The bad news: those things do happen in parks.  But then again, these days they happen just about everywhere else, too. The good news: you can change it. Yep!  Every time you go to the park, enjoy it and leave it a better place for the next visitors. With a little persistent work, a park can go from sour to sweet faster than you’d think.

    First of all: we need parks. They’ve got an assortment of trees, grass, picnic tables, playground equipment, space to run and play and get out our ya-yas. Not just for kids either. Studies show that time spent in nature in your own neighborhood reduces mental fatigue and aggression.

    Cool, huh?

    Second: the more you, your kids, and your neighbors go to the park, the stronger your neighborhood is. Seriously. It’s a gathering place. You meet your neighbors, they recognize you and your kids, social ties are formed. Rinse, repeat, and voilà: built-in accountability. Then when your teen is caught climbing on top of the public bathroom’s roof, your neighbor can say, “Hey, dude, I know it’s cool up there, but would you mind coming down because I don’t want the little kids to get hurt trying that same stunt.” Your kid knows the neighbor and IMG_0459is less likely to be a jerk and more likely to think of the little dudes.

    Third: Crime is more likely to happen in barren, neglected spaces (think vacant lot) than a planned open green space where people enjoy gathering often. The more neighbors frequent a park, the more witnesses there are to prevent crime. If you do see a crime happening, be safe and report it, don’t try to stop it.

    What can you do to improve a park gone sour? Claim it. Visit habitually and bring a friend, your kids, and a few plastic bags to collect and dispose of garbage (maybe gloves or an $8.00 pickup stick too). Is the garbage overflowing or no receptacles are available? Call the city. Repeatedly. Show them someone cares enough to ask about the park. There is little else that is more effective or less costly than pride of place. When people invest even a little bit of time and effort to keep their local park clean and free of litter, the rewards are amazing. Also, attend neighborhood meetings if you have the time and energy.

    And now some of you are asking, WHY? Well, to recap:

    1. More calm, less stress. We all need that.
    2. Pride of place = a better place for everyone.
    3. To set a good example for your kids. (yeah, sometimes this takes a while to kick-in)
    4. Because it’s the right thing to do.


    So get out. Take a break, make a few PBJ’s, fill a big water bottle and bring a Frisbee, because it’s time to take your kids to the nearest park and have fun. Yay!


  2. Smoothies!

    June 23, 2013 by admin

    This post is by regular contributor Brenda Winter Hansen of write again.

    11971482631929059205SRD_strawberry_smoothie.svg.med

    Hot parenting tip of the day: hand blenders+fruit=hooray!

    I love breakfast. I love to prepare, cook, and eat breakfast, sometimes more than once a day. BUT, my kids are not always on the same page when it comes to the most important meal of the day, or even a decent snack. That’s when I whip up the quickest, most nutritious, and tasty solution ever. Get ready for fireworks in your mouth…or if that’s too exciting for your wee ones with restrictive palates, go simple. I’m always amazed by the happiness and satisfaction derived from the magical marriage of chocolate almond milk and a banana.

    Smooth Moves:

    1. You need a machine!  Old style blenders work great, but I LOVE my immersion hand blender ($15-40). It’s one speed with a removable bottom which makes it super easy to wash. My first one lasted twenty years and they’re great for soups and scrambling eggs too.
    2. You need a container!  If you have a blender, you’re already there. If you have an immersion blender, make sure you get a sturdy pitcher that’s not too wide, and deep enough to avoid super splatter or a big 32oz yogurt tub will do.
    3. You need ingredients! Buy organic if you can.Get creative with combinations of fruits, veggies, juices, milks, yogurt & kefir, protein powder, nuts & nut butters, silken tofu, chocolate, tea, and sorbet. There’s a thin line between a smoothie and a shake (dessert!), and ice cream is where I draw the line. My kids, who make their own smoothies now, will occasionally scavenge the remaining blob of ice cream for their “smoothie” and try to justify their nutritious breakfast. I am not convinced.


    Smoothies can get really complicated, but I like to start simple. Bananas are the bomb. If you need to jump start your kids who are running late or cranky as hell because they need a snack, make the simplest of smoothies: Banana+milk (hemp, oat, soy, almond, coconut, whatever). But know your audience. If your kid hates melons, don’t start there. Work up to adding vegetables. My husband, once desperate to get some real nutrients and fiber into the kids, snuck in a whole head of broccoli and they didn’t bat an eye.

    Vegetable juices are a great way to slowly introduce their flavor to the mix. Carrot and beet juice are great, especially when combined with fruits like apples and blueberries. Other great fruit & veggie additions are: tomatoes, avocados, oranges, mangos, kale, cucumbers, pineapple, peaches, spinach, you name it. By all means, stock up on frozen fruits and berries. If you can buy or pick extra to freeze, even better. They make the dark winter months brighter, and the hot summer months cooler.

    Protein is super important for building muscles and staving off hunger, so stock up on protein powders (whey, soy, or brown rice) and tofu.  Mori-Nu silken organic tofu is great because it comes in aseptic packaging and doesn’t need refrigeration before you open it. Cottage cheese and yogurt give a dose of protein and calcium. Nuts also add a boost protein, essential fats, and a great creamy texture. Try cashews, almonds, and pecans.

    Are your kids ready for fireworks? Then toss in one of these interesting and delicious additions: fresh grated ginger, cinnamon, nutmeg, parsley, vanilla, rose water, a pinch of sea salt, honey, brown rice or maple syrup, ground flaxseed, coconut oil, or water.

    Uh-oh, you made too much and don’t want to waste it? Don’t worry, make popsicles.

    Guess what! Big kids need smoothies too, and I’m not talking about the adolescents! Whether you need a pick-me-up or a chill-me-out, take your smoothie to the next level with a shot of wow. Espresso, green tea, yerba mate, or liquor of choice will transform your smoothie to a spiky and put a smile on your face.

    Need more inspiration? Check out your local library or indie bookstore for smoothie cookbooks. There are hundreds to choose from. Bottoms up!


  3. Digital Detox Week

    April 26, 2013 by admin

    This post is by regular contributor Brenda Winter Hansen of write again.

    Unless you live in a very remote place (are there any left?), it’s pretty difficult to get away from technology these days. We use it for work, communication, entertainment, and education. A lot of people (sadly, I’d bet on most) spend way more time looking at a screen than checking out the natural world outside their window. Sure it’s a choice, but when it comes to raising well-adjusted children, it’s a parent’s responsibility to make the healthiest choices possible, and we all know by now that too much screen time isn’t good for the developing brain.

    Unfortunately, according to a 2011 New York Times article, our children’s digital and screen time consumption has only gone up. A 2012 Science Daily article discusses the mounting evidence of health risks associated with too much screen time, citing that negative impacts kick in after as little as two hours a day. A disturbing notion when the IMG_7903average North American child is in front of some kind of screen nearly eight hours a day.

    Screen-free Week first started in 1994 as a way to encourage people to use electronic screen media responsibly. Its name and supporters have evolved in the last decade, but the idea remains the same: turn off the media and turn on life! Ideally this includes: cell phones, computers, tv’s, gaming devices, you get the idea. For many parents who rely upon technology to negotiate the landmines of parenting, this is a huge challenge. Even in my own household where we’re very modest consumers of screen time, I balk at the idea of giving up my computer and smartphone for a week.

    This year April 29-May 5 is Digital Detox Week, and if you can stop using all of it for a week, go for it. But, if you don’t think you could possibly do without all of your tech, I propose a compromise. Take an honest look at how much you and your children consume and decide what you can cut out or reduce. Make it hurt a little so you actually get a sense of living without it. Start with social media for you and maybe video games for your kids. If your household is really into tv, just unplug it. That’s the easiest to cut out. Be prepared with alternatives: books, games, crafts, parks, field trips, hiking, museums, keep a family journal of the experience. Build in some support and do it with another family so it’s easier to get through the week. If you really need an incentive, plan a digital-free, but fun reward for whoever can go the whole week without digital technology gets their favorite meal. The greatest possible outcome is for everyone to realize that their lives will be richer if they moderate their digital interactions.

    The irony of blogging about this is not lost on me, but let’s be realistic. Digital is not going away until the Apocalypse, but it’s more important than ever that our children learn how to interact with other people and their environment. So unplug and go play in the mud!


  4. Pen Pal Persuasion

    March 26, 2013 by admin

    By Brenda Winter Hansen

    I still remember when I got my first official pen pal in fourth grade. The details are fuzzy, but I think it was through a magazine. I desperately hoped my mysterious pen pal would herald from somewhere that wasn’t a small Midwestern town of 10,000. Maybe France? Maybe Borneo? Of course I’d forgotten to take language into consideration, or logistics for that matter, so I was pretty disappointed when my new and exotic pen pal was from…Ohio. Left to my own devices, I carried on a half-hearted, six-month correspondence with a total stranger who never stopped being one. I guessed she was probably just as disappointed.

    But wait, now the good pen pal story! I had a couple cousins (one from each side of the family) who were about my age and lived nearby, but in different directions. We got along great, so writing back and forth was a natural extension of our relationship. Granted, it was mostly adolescent drivel.  But those letters were a place we could share crushes, hopes, dreams, and grand schemes. I think the best part was that they already knew me.

    Fast forward to my eleven-year-old daughter. All on her own, she’s developed an avid correspondence with a classmate who lives less than a mile away. She said she loves getting news from her friend and the cool stamps. As a parent, it doesn’t hurt to keep an eye on the letter frequency. Don’t nag, but give a gentle reminder if it seems as though your kid has let it drop. Get some inexpensive notecards, a couple designated pens, (decorative!) stamps, and a box to hold everything. Stickers are pretty awesome too. Reminding her how much she enjoys receiving a letter is usually enough to get my daughter to keep her end of the deal.

    One thing she taught me is the importance of short letters. I still get overwhelmed when I sit down to write a letter because I think I have to write a book. My daughter’s correspondence is so successful because the letters are short and sweet. Genius! The other way to keep it engaging, is to encourage drawing and decorating. Sometimes they send each other cut out pictures they find amusing, or even an article from a favorite magazine. Keeping the expectation low will keep the satisfaction high of both sides of the paper trail.

    If you want to take the pen pal adventure one step further, encourage your child to write to an adult (who is also interested). Scout someone out, maybe a neighbor or an elderly person.RAbbbit 
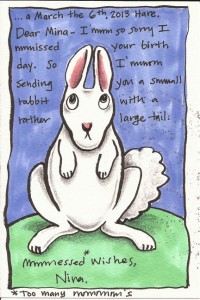
Again, keep the expectations low. Postcards are great. Two sentences and, boom, put it in the mail slot. My daughter has started to letter swap with local children’s author/artist Nina Laden (http://www.ninaladen.com/) and it’s lovely to hear them both be excited about it. Nina says that she loves to, “see and “hear” the thoughts that make kids curious and engaged.” She added, “I think it’s important to encourage our children to write letters because putting pen to paper is such a different experience than the non-creative collection of digital detritus we pass for communication these days.” I couldn’t agree with Nina more.


  5. Bring in Spring!

    February 20, 2013 by admin

    Bulb1  By Brenda Winter Hansen

    Are you and your wee ones getting cabin fever, wishing the world warm and in full bloom? Well, not even Punxsutawney Phil can make winter shorter, but with only a few special ingredients, you and the kids can bring your own personal spring inside.

    Bulb3Forcing bulbs has long been a gardening tradition, and was all the rage in the 1800’s. It works by chilling flower bulbs for a few weeks, then bringing them into a warm environment to force them to bloom earlier than they might have outside. Seeing plants grow before your eyes in the dead of winter is fascinating at any age, and the payoff of a beautiful flower with a heady perfume to freshen up the air is a memorable thrill. Kids love helping out, and will probably ask for it every year. Just make sure to put down newspapers if you’re going to use potting soil.Bulb4

    You’ll need bulbs first. If you’re like me, you probably have some in your garage that you never got planted in the fall. I’ve had the best luck with paperwhites (a.k.a. narcissus), daffodils, hyacinth, and crocus, though amaryllis and tulips are also fine choices. Amaryllis are often sold in drugstores already potted and ready to force. They are pricier, but the fanciest of flowers to force. If you don’t have any bulbs on hand, ask neighbors if they have any they didn’t get planted. If they do, make sure to make a forced bulb garden for them too. Assuming the ground isn’t frozen, you can also dig them up, if you remember where they are. Local hardware stores or nurseries are also likely to have inexpensive bulbs that have been chilled long enough to be ready to force.

    Many resources say bulbs need to be chilled at a specific temperature for a specific number of weeks, but I’ve never paid much attention to those claims and have had great luck with late winter blooms. Once you have bulbs, it’s time to find containers. Narrow necked vases (called forcing vases) are perfect for paperwhites and hyacinth, but you can use old jam jars too. Narrow ones are good, but use some rocks, or several bulbs, to prop each other up if you use a wider jar. Wide shallow bowls, can be filled with rocks, pebbles, and just enough water to come to the top of them. Then, nestle a bunch of bulbs into the rocks (root side down, pointy side up!). The last way to force flowering bulbs is too find a shallow wide pot and sandwich the bulbs between two layers of potting soil, but make sure the points are just poking out of the dirt. The soil should be damp, not sopping wet.

    bulb2For all of these methods, leave the bulbs in indirect light until the first bits of green are poking out a bit. Otherwise the poor flowers might try blooming before it has much of a stalk. Once there is a stalk, give it a little more light and turn it a little everyday so the stalk grows straight. This is a great time to introduce phototropism to your offspring! Keep the kids interested by having them take notes and draw pictures every few days and you’ll have another fine example of art marrying science. Enjoy!

    For more info, check out: http://www.oldhousegardens.com/forcingbulbs.asp


  6. Children’s Book Illustrators You Will Love

    January 25, 2013 by admin

    By Brenda Winter Hansen

    When my babies were toddlers, I spent a LOT of time in the picture book section of every library and bookstore I came across. While consuming between 5 and 500 picture books a day, I realized the world is filled with super cool creative artists who are probably having a lot of fun making kids happy. Of course, there are oodles of illustrators who we adore, but a few of our household favorites are brilliant stand-outs that I have to share, just in case you don’t know them already. Make sure you take a peek at their websites, which are gorgeous works of art in themselves.

    PaschkisJulie Paschkis has a bold style and a taste for contrasts. Her images catch you and draw you in for a closer look. She has a knack for drawing on historical and cultural context when creating illustrations that always deepen the experience of the story itself. Yellow Elephant: a Bright Beastiary, is a great example of how lush her work is. Every time we pour over the lovely poetry of the book, we see new details in her images. http://www.juliepaschkis.com/

    The first time I read The Incredible Book Eating Boy aloud to my daughter, she insisted I read it again immediately. Handwritten text, collage, and cheeky humor are standards of Oliver Jeffers’s singular style which is as refreshing as it is endearing for kids and adults alike. His images are simple in presentation and rich in subtext, captivating the reader with the promise of a mystery to be solved. http://www.oliverjeffers.com Jeffers

    SweetWith close to a hundred children’s books to her credit, Melissa Sweet is a living national treasury and her work is not to be missed. Her colors are pungent and magically luminous from within. In her hands, objects and creatures come alive on the page. She conveys a sense of wonder that children embody, but we older folk may lose on occasion. You can’t go wrong with any of her books, but I highly recommend the Life on Earth matching game (memory) illustrated by Melissa. I love playing with my daughter, just so I can look at the cards! http://melissasweet.net/

    Dan Santat creates impeccable illustrations that I can’t get out of my head, and I love it. Whether it’s a picture book (Oh No!) or a graphic novel (Sidekicks), his images take you on an adventurous thrill ride that you want to relive over and over again. The humor Dan brings to the page elicits guffaws from the kids, and the tidbits he stashes for the adults are brilliant (Bawk & Roll). Young artists in the making will love his website which is chock full of his finished art, sketches, and doodles. http://www.dantat.comSantat


  7. 5000 Maniacs

    December 31, 2012 by admin

    IMG_1410ThriftyRambler has received over 5000 visitors since it was established less than a year ago!  We thank you for reading our content and returning to our site.  It has been a fun adventure and we’re only just getting started.  We’ll continue to bring you our insights, our questions, our travel tips and recipes, and our lists of the greatest ways to spend time with your family in a way that won’t break the bank!

    A special shout out to our fellow Rambler, Brenda Winter Hansen, who has provided help to us on a number of issues from the get-go.  She’s written a bunch of super posts for TR and we can’t wait to see what she delivers in the future!

    As we begin a New Year of adventures, we encourage you to share our page with your friends.  Hit the “Like” button on the posts that resonate with you.

    If you have suggestions for topics, questions about anything, or want to reach us, please add a comment to our website, our Facebook Page, or email us and let us know.

    Thanks again for reading, for reacting, and for taking your own steps to creating a memorable life for you and your family.


  8. When the Weather Outside Is Frightful

    December 30, 2012 by admin

    UntitledBy Brenda Winter Hansen

    Here in the northern hemisphere, winter is upon us and no matter where you live, there are likely to be at least a few days when a battle is raging outside your door and it looks like Mother Nature is kicking humanity in the backside. These are the days when rain, sleet, snow, and ice are all better appreciated from the warm side of a window, so I’d advise having a versatile toolkit on hand in order to avert the unbearable pain of being inundated with howls of boredom from your kids.

     FOOD:

    • Let it be a (healthy) grazing day. Make sure there are plenty of crackers, sliced fruit & veggies, and dips or spreads on hand for your hungry beasts.
    • Let them bake. Yes, there will be a mess, but be brave. After carefully evaluating their age-appropriate abilities, set out the ingredients & tools needed to make a simple recipe (Banana bread? Cookies? Breadsticks?)
    • Cookbooks. Yep, I said cookbooks. I keep in my arsenal a variety of kid-oriented cookbooks (lots of how-to pictures) that my ten-year-old loves to peruse while contemplating her next kitchen disasterpiece.

    CRAFTS:

    • Collage! Yes, painting, drawing, and clay are often at hand, but seriously, making collages has to be the single most popular yucky-day-inside-activity at our house. Just clear the table and pull out a few old magazines, some glue, random stickers, and safety scissors. Start with a sheet of construction paper, poster board, a cardboard box, or any sketchbook paper you may have on hand. This is a great way to promote visual storytelling and you may be surprised with the results.
    • If your kid is feeling ambitious, be sure to have Modge Podge on hand. I think the possibilities are endless. http://modpodgerocksblog.com/2012/08/20-easy-mod-podge-craft-projects-for.html

    STORYTIME:

    • Believe me, nobody is too old for storytime. While your kids are busy spreading bean dip on the wall or collaging the cat, play an audiobook for them. Booksshouldbefree.com has a boatload of free audiobooks just waiting for you to discover. Besides, what better way to introduce your children to amazing classics like Little Women or Tom Sawyer?

    If your kids are into reading all by themselves, it pretty much goes without saying that a day inside the house means the perfect escape into a book, which is a win-win situation. Really. I keep a few well-reviewed books on hand for the day one of my kids (ten-year-old) proclaims boredom or a desperate need for a read (the teenager, no lie). Reluctance to take the suggested read in hand soon evaporates when you read the first chapter out loud. I swear, this approach has yet to fail me, and I have very contrary children. Forget house chores and homework for the day; that book could change their life! http://www.booksshouldbefree.com

    MUSIC:

    • Music is a staple in our house, whether it’s Pandora, Spotify, or our extensive and varied library. There is no shortage of music for every mood or the chance to hear something new to stretch young ears. Also, music is the perfect accompaniment to cooking and collage.
    • Disco! Move the furniture! Turn down the lights and turn up the music! Shake your booty and dance with the kids. It’s a blast and absolutely called for especially if cabin fever is starting to hit.

    GAME DAY:

    • I’m not a huge fan of video games, and while I acknowledge there are myriad thoughtful and engaging games for kids using media, my default is to dig out a favorite board or card game. Now is the time to stock up on a few new ones too. Do your research! Family-oriented kid-friendly games are created every year. Luckily, experts review them so you can find the shoe that fits your foot. Sure it’s easy to order off of Amazon, but chances are, there is a lovely little game shop not too far from your hood where you can get some great games and wonderful customer service. Don’t be shy either. Ask them questions to help find the perfect game for a really, really rainy day in your neck of the woods.

    http://boardgames.about.com/od/awards/tp/2012-Readers-Choice-Awards.htm

    http://boardgamegeek.com/familygames/browse/boardgame

    http://www.boardgamerevolution.com/popular-board-games.html

    Last, but not least, take it easy. Slow down. Make cocoa or tea. Stretch and relax a little yourself. When you cut yourself and the kids some slack, everyone is going to have a better time making the most out of a day indoors together. Enjoy!


  9. Holiday Craft Ideas

    November 27, 2012 by admin

    By Brenda Winter Hansen

    When the winter holidays roll around, I have to constantly fight my Charlie Brown tendency to get all excited only to be let down by how vacuous and fraught it can all seem, especially when the budget is tight. I’ve found the best defense (besides sharing food with friends!) is carving out a little time to help the kids make thoughtful and easily completed crafts for keeping or giving. I’ve collected some worthy standards and a couple new ones to share, so have a look and be inspired to make a little mess with your kids this season.

    Handmade gift tags/bookmarks-Colorful card stock plus string (think yarn, embroidery thread, or something sparkly) is the basic recipe for speedy gratification. You’ll also need cookie cutters, a hole-puncher, scissors, markers, and quite possibly glitter glue. I know it’s so cheap to buy stickers made in China to slap on your gifts, but why not let the younger set make and decorate gift tags with a more personal touch? Colorful card stock is easy to come by from a local craft/paper shop, as is embroidery thread, decorative string, or yarn. Trace cookie cutters onto the card stock and cut them out. Be careful not to punch a hole too close to the edge of your tag or the string will rip through. Cut lengths of string about 10 inches long and attach each one to a tag. One side can be decorated and the other can be the To/From side, resulting in an ornament worth hanging! Cut the cardstock into long rectangles and you have lovely bookmarks.

    Felt ornaments- These are great for giving and keeping. You’ll need several sheets of colored felt, depending on how many ornaments you’d like to make, string/yarn/embroidery thread, pillow fill (optional), a basic sewing kit, glitter glue and decorations are optional but nice. Use cookie cutters as stencils for shapes. Don’t bother to punch a hole for the thread, just use a large-eyed needle for pulling string through to hang it. Ornaments can be a single layer of felt or, if you cut two pieces of the same shape, you can make a tiny pillow ornament by sewing the two pieces mostly together, stuffing them with pillow fill (from fabric store) and finish sewing up the rest. Sequins, glitter glue, and sewn-on scraps of felt are great for decorating the ornaments, just make sure all glue is thoroughly dried before packing these up as gifts or hanging them up. Here’s a link to a free template for felt mushrooms. http://thelongthread.com/?p=5237

    Back in the Stone Age, when I was a kid, my parents did the Yule tree decorating in the dead of night while all six of us were asleep. We’d wake up to the magical beauty of a tree that stretched from floor to ceiling and was covered with enough bling to weigh down an LA pimp. In retrospect, I think it was their version of “date night” during the busy and penny-pinched holiday season. My mom explained once that they each had favorite ornaments to hang, but there were two homemade painted cookie ornaments that waited until last. Dad would hang up “hers” (an angel), and Mom would hang up “his” (a tin soldier), and then they kissed. Not kidding. And you know what? Those cookies lasted forever! What I’m saying is, make these cookies, but do not eat them. Make them into a memorable tradition whether you have a tree or not. Make one for each child and creature in your household. Hang them on the mantle, in a doorway, on the wall. Have fun and be hopelessly romantic. Oh, and it would probably be a good idea to make some edible dough too, or you’ll never hear the end of it.

    Inedible Cookie Ornaments

    300F for 1 ½ hours
    Ingredients:
    3 Cups Flour
    1 Cup Salt
    1 1/2 Cups Warm Water

    -Mix flour and salt and then add water gradually and knead dough.  If the dough is too dry, add water.  If it is too sticky, add flour.

    -With flour to reduce sticking, roll out dough onto baking paper until the dough is about 1/4″ to 3/4″ thick.  The thicker the dough, the longer they will need to bake.

    -Use cookie cutters or hand shape each ornament and place on parchment paper-lined baking sheet. Don’t forget to make a hole in each ornament before baking.

    -Bake at 300F for about 1½ hours. Flip ornaments half way through. Cool completely before decorating with paint, glitter glue, beads, etc. Make sure to use newspaper or parchment paper underneath the decorating station, because it is guaranteed to get messy!

    Linocut holiday cards– This project requires a little more time and money investment, but you’ll be able to use the tools for ages. It’s a great project for the whole family. Some parts of it are suited for an older, steadier hand, and others can be done by the youngsters. You’ll need a linoleum cut set (from a craft store) a couple sheets of linoleum (good to have one to practice on), transfer paper (optional but very helpful), ink roller, bright card stock, and ink. Watch this video http://www.youtube.com/watch?v=kE3Uuhylur0 for a quick demo. If you’ve never done this before, then pick a simple image for your card, like a snowflake or a star. Adults and older children are better suited for using the sharp cutting tools, but smaller kids should be able to help inking the roller and applying it to the cut linoleum. You’re the best judge of your child’s ability, so make sure their task is one they won’t get frustrated with and can be proud of as well.

    Here’s another card idea (low-tech & less expensive) for the older ambitious child: http://extremecards.blogspot.com/2012/01/easy-pop-up-snowflake-cards.html

    Everybody who knows them loves holiday noise crackers– So this year, finish your crafting with a bang and make your own. Fill them with silly things or goody jokes to surprise friends. It’s pretty easy to do these on the cheap and well ahead of time, so they’re perfect for bringing to a party or having them ready for a post-dinner pre-dessert treat. The snaps can be found quite inexpensively online at Old English Crackers. Have a blast!

    http://crafts.kaboose.com/christmas-cracker.html

    http://www.oldenglishcrackers.com/christmas-cracker-components-c-4.html

    HOW TO ASSEMBLE YOUR PARTY CRACKER

    Either use our pre-sized Cracker Tubes (105 x 50mm) or make your own by preparing 3 rolls of card, each 10cm wide x a suggested 30cm, rolled and taped to form a tube of diameter to suit the gift to be included.
    The first roll will be left in the cracker, the other two are for use as temporary end formers and will be removed once the cracker is made.

    Cut crepe paper 35cm x 35cm per cracker (or larger if you wish). You may also use tissue paper, cake board paper, or fancy gift wrap for colour effect. NOTE: THE PAPER YOU USE MUST BE ABLE TO BE TORN EASILY.

    Arrange the rolls on the crepe paper along the grain of the paper. Lay a Cracker Snap between roll and paper, then roll the paper to cover.

    Gently withdraw one end roll approx 2cm (1 inch) then twist and gently (but firmly) tie the crepe paper between the centre and one end roll. Tie the crepe paper securely with narrow ribbon.

    Fill the centre roll with novelties, personal gift, jokes, paper hats, lollies, etc.

    Similarly gather and tie the second end with narrow ribbon.

    Decorate your own special party crackers with ribbons, transfers, stickers, glitter etc. The choices and variety possible is endless.

    The two end cardboard rolls have been used to maintain the shape throughout the assembly process. They may now be removed to use again on your next cracker.

    With a friend, each hold the snap, then give it a quick sharp pull for the BANG. http://www.goldingcraft.com/cracker.htm

    Happy Holidays!!


  10. Feeding the After-School Animals

    October 23, 2012 by admin

    By Brenda Winter Hansen

    I don’t know about your kids, but I have a sneaking suspicion they have a lot in common with mine when it comes to blood sugar levels at about 3:30 in the afternoon. Watch out for flying shoes, backpacks, and the occasional off-color insult! It takes more than music to tame this kind of beast, only a snack in time saves the stressed-out mind. Not kidding.

    You’re not alone in the temptation to buy a box of high fructose corn syrup “fruit snacks” or grab somefriedthing at the local deli, but with a little prep, you can have cheaper and more nutritious nosh available for those growing brains you love so much. With that in mind, I’m sharing a few ideas and recipes that can make the school-to-activity transition smoother and buy some time until dinner to boot. But first, make sure you have fresh fruit on hand and ready to eat. Then, add in these more substantial choices:

    For the dippers I suggest hummus. Seriously. I know you can buy this stuff at the store, but I have yet to find one that actually tastes as good as the homemade hummus that I make in about 15 minutes. Besides being low-fat & high-protein, it’s great for dipping an array of raw veggies and crackers.

    PERFECT HUMMUS

    1-2 garlic cloves

    1 can of chickpeas (or 2 c. cooked from scratch)

    2-3 T. of tahini

    zest from half a lemon

    juice from 1 lemon

    2-3 T. virgin olive oil

    1 t. salt, or to taste

    If you have a food processor: turn it on and add everything while it’s running. Scrape down the sides and add a little water if needed. That’s it! If you have a blender: add everything before you turn it on! If you have neither: mince or mini-grate the garlic and mash the chickpeas. Mash and mix everything until you have a fairly consistent  texture. If you want it to look fancy, dust it with paprika, drizzle with olive oil, and sprinkle with chopped parsley. Voilà!

    For the sweet tooth try these homemade granola bars. They are easy to whip together in the evening during homework time, or even around bedtime. My kids love these in their lunches too. Feel free to experiment with the ingredients; it’s a pretty flexible recipe.

    NUTTY OAT BARS: Preheat oven to 325F Bake for 25-30min

    3 C. rolled oats

    1 C. chopped nuts

    1 C. cranberries or other chopped, dried fruit

    1 C. chocolate chips

    ½ C. brown rice syrup (or honey/maple syrup/brown sugar)

    ½ C. cooking oil

    1 egg (if you leave this out, use a little more syrup and oil)

    In a large mixing bowl, combine the first four ingredients.  In a smaller bowl, mix the syrup, oil, and egg then add this to the dry ingredients. Mixture shouldn’t be too wet or too dry. Spread and pat down in a foil or parchment-lined well-greased cookie sheet with a rim and bake for 25-30 or until golden brown on top. Less time = chewy bars, more time = crunchy bars. Know your animals and their tastes! While the granola is still warm, use a knife to score the mass into bar-sized portions. When cool, finish cutting and use parchment or plastic to wrap individually or place in an air-tight container. *BONUS sneaky additions: a couple scoops of protein powder, ground flax seeds, or flax oil. My kids are picky, and I’ve never had any complaints.

    For the adventurous youngster or an active adolescent who’s gotten past some pickiness and is beginning to eat you out of house and home, I present a delicious salad that is refreshing after school or in their lunch. Crunchy, light, and yet loaded with protein, it’s also a great side dish for any potluck. It takes a little more time because of chopping veggies and cooking spelt, but it’s worth it and good to make on a Sunday evening as it tastes better the next day and lasts for several days in the fridge. Again, the veggies and herbs are pretty flexible. Use favorites!

    YUMMY CRUNCH SALAD

    1 C. raw spelt, boiled for 1 hour, drained & rinsed

    1 can chickpeas, drained

    1 clove garlic, minced

    ½ cucumber, peeled & diced

    2-3 stalks celery, sliced

    1 pepper, any color, diced

    2 carrots, peeled & diced

    3 green onions, sliced

    ¼ C. red onion, minced (optional)

    ¼ C. parsley, minced

    1 T. basil, minced

    1 t. dill

    juice of 1 lemon

    2-3 T. cider vinegar

    ¼-½ C. mayonnaise, according to taste.

    While the spelt is boiling away, prep all the veggies and mix them together in a big bowl with the herbs and dressing. Add the drained, rinsed, and cooled spelt to the rest and mix thoroughly.

    For those who like it hot, I’ve recommend a mini-pizza that is super easy to make ahead and freeze. These are great to have on hand and a snap to microwave, bake, or throw in a toaster oven. It’s well worth making sure you have a well-loved red sauce on hand. Customizing to your child’s tastes is encouraged.

    MINI PIZZA LOVE

    1 package of English muffins, split

    pasta sauce

    grated cheese (mozzarella & cheddar are the standards, vegan subs work fine)

    toppings

    This is so simple, you may want to have your child help assemble these and use it as a math opportunity too! Spread sauce on each half of muffin and sprinkle with a little mozzarella. Pick your toppings, but be careful not to overload. Favorites: pepperoni (veggie & turkey are great alternatives), Italian sausage (or look for a veggie substitute near you), black olives, and peppers. If your kid just wants cheese, go with it. At least they’re eating the pizza and not you! When the muffin halves are all topped, sprinkle a little more cheese on each, then individually wrap in plastic and freeze. Good for a month. Bake at 425F for 10-12 minutes or microwave for 1 minute then add 30 seconds at a time if needed.

    You may already feel as if you have no time, but if you manage to squeeze any of these into your schedule, it will save you time, money, and nutritional worry. Just remember to have snacks close by when your young beast is released!